Monday, October 29, 2012

How To Make Some Tender Seitan

Braised seitan with peas and mashed cauliflower
Making seitan can be a long and arduous process. I remember making this stuff from complete scratch with whole wheat flour and water. That's it. That was a four hour process at least. So my love affair with "wheat meat" did not make it to adulthood with that method. But thank those lovely food scientists and my mother's wonderful cooking for this recipe. It still takes about 2 hours but I think it's worth it and one batch goes a long way.

Mind you this is what is considered the "quick method" (complete screw face at this being the quick method) so if you want to bake it, well, that's another post for another time. Use this quick method for chicken-fried seitan or quick stir-fries. I used it for a (sort of) braised dish pictured above.

The thing that makes this tender? Soy flour. I find that if I use equal parts soy flour and gluten flour it becomes really tender and a lot less chewy than using the recipe on the back of the box. If you want it a little more tough, add more gluten flour but never exceed a 2:1 gluten flour:soy flour ratio or it'll be like chewing leather. Ew. Anyway, enjoy!

Ingredients:
1/2 cup vital wheat gluten
1/2 soy flour
about 1/4 cup warm water
various seasonings
salt and pepper
one really big pot

Directions
Put a large pot of water on high heat. Heavily season your water with your own mix of seasonings. I use the following:
salt
pepper
paprika
liquid smoke, hickory flavor
minced onions
4 cloves of garlic
poultry seasoning
 
Mix the flours in a bowl. Slowly pour the warm water in the flour mixture.

Knead mixture for about 3-4 minutes. After kneading your ball should be firm and should not fall apart.

After much kneading, this is what your gluten should look like.
For the next part you can do one of two things:

Roll out the dough with a rolling pin and cut the mixture in equal parts.

OR
Pull pieces of the gluten from the ball and stretch it out with your hands until it forms rounds.

I use the second method.

This is what your pieces look like before you put them in the water.
Place the gluten in the pot of water (that should be boiling about now. If not it's hot enough to place the pieces in there).

Cook the gluten for at least one hour.

Drain and cool and prepare as you want.

I hope my instructions were clear enough. Tell me what you make with it!

And this is what your pieces will look like after cooking.


Here's a picture of some veggies. It was just too much brown in this post.


Saturday, October 13, 2012

Curried Carrot Soup

It's cold outside. Not "brr. I can't feel my toes" cold but "hmm...soup would be nice on this brisk autumn day" cold. And that's exactly what I did. I made some soup.

I've always liked making soup. My mother tells me my orange lentil soup is really good (another day).  And I'm currently watching my figure ferociously so I wanted to make a soup that was both warming and guilt-free. I paired this soup with a Tofurky panini on whole wheat bread with honey mustard and white cheddar. Twas filling and really good. I hope you like it.


Curried Carrot Soup


Ingredients
-4 medium carrots
-1 white potato
-1/2 small white onion
-frozen peas (optional)
-3 cloves of garlic
-1 tbsp. vegetable oil
-Curry powder (really pile it on)
-3 cups of vegetable stock (or 1 veg. bouillon cube and 3 cups of water)
Small amounts of the following:
-Ground Cumin
-Ground Coriander
-Celery Seed
-salt and pepper to taste
-A dollop of Daisy plain yogurt to serve (optional)


Directions
Peel and chop onions, garlic, potato, and carrots. Set aside.

Heat a pan with oil on medium high heat. Saute veggies for 10 minutes. Add vegetable stock and reduce heat to medium low.

Add all spices to mixture. Cover and cook for 15 minutes.

Ladle majority of vegetable mixture into a blender and blend until smooth. If you like all of your soup smooth, ladle the entire mixture in the blender and blend until smooth. Pour blended mixture back in pan and turn neat to low. Reduce heat to low.


Add peas and cook for another 2-3 minutes. Turn off heat and serve with a sandwich of your choice or crusty bread.

Saturday, September 29, 2012

Lime and Coconut White Chocolate Bark

I've never really good at baking. I'm one of those people that likes to throw things in a pot and hope for the best. For regular cooking that's perfect. That's typically where I get my best ideas. For baking it leaves me with tons of sunken dense cakes and salty cookies. The only thing I can bake well without measuring is cornbread. And that's only because you really can't go wrong with cornbread. Just put enough baking powder in it to rise and there you go.

I went on a tangent.


So I don't bake. But I do like sweets so I decided to try some bark which is ridiculously easy to make and such a great base to really get creative. I wanted something that reminded me of the tropics (because I really need a vacation from this life of mine right about now). Consider this my ode to the summer past and sorely missed on this cool October Saturday.

Lime and Coconut White Chocolate Bark

Ingredients
-1/2 bag of white chocolate chips
-Unsweetened coconut flakes
-Sliced Almonds
-1 lime juiced
-Zest from one lime


Directions
Melt the white chocolate chips in a double boiler (or a bowl over a pot of boiling water) until completely melted.

Take off of the heat and stir in the lime juice and lemon zest until completely mixed. Your mixture might look a little pasty and no longer smooth and creamy. I'm sure it has something to do with the lime juice mixing with the milk solids and cocoa butter. But it'll be fine.

After, mix in the almonds and coconut.

Pour the mixture into a shallow pan covered with wax or parchment paper. Leave in refrigerator for at least one hour before cutting and serving.

Get creative with your mixtures. Try some pumpkin or chai-spiced bark for a more fall flavor. Use milk or dark chocolate instead of white. I'll put up more bark combos in the next week since it is so easy to make and really great to have on hand. But please don't wait on me to do some experimenting of your own!

I've been gone for a minute.

If you've been wondering what's been keeping me from posting I'll tell you. Life has been keeping me from posting. Not to say that this somehow isn't a part of my life. I've just been so distracted with everything that doesn't seem to quite be going right that I haven't given this blog as much thought as I should. But I'm back now. I'll also try to blog once a week. So yeah. Sorry for the absence if you've been reading.

Tuesday, August 21, 2012

Peach BBQ Seitan Sandwiches

   I grew up making seitan (we called it "kalebone" which is English phonetics for the Hebrew word protein) and let me tell you making this stuff is a long and arduous process. So any chance I get, I go out and buy ready-made seitan to avoid wasting 3 hours of my life preparing the stuff some scratch. Whole Foods has these packages of plain seitan in their stores but I'm more a fan of the Chinese brands because they come already seasoned and processed in different ways to imitate different types of meat like pork, chicken, and my personal favorite duck. The seitan at Whole Foods may be easier to find though.
If you can find this stuff, I'm telling you it will change your life.
   What makes this stuff so great is its versatility. Like tofu, it can take on any flavor; unlike tofu though, I've found that it is even more palatable to non-vegetarians. They just seem to like the texture better I guess.

Peach BBQ Seitan Sandwiches


Ingredients

10 ounces of seitan
Hamburger buns or kaiser rolls
Vegetable oil

For the BBQ Sauce:
2 peaches, skinned and diced
1 small onion, roughly chopped
about 1 tbsp. of garlic powder
about 1 cup of ketchup
about 2 tsp. of the following:
Dijon mustard
Cider vinegar
Vegan Worcestershire sauce
Blackstrap molasses (or one tsp. of pomegranate molasses. I used pomegranate molasses. You need to use less of it because it is much tangier than the blackstrap version because of the pomegranate juice)
A few splashes of Liquid Smoke

Black pepper
If you can't find vegan Worcestershire sauce, soy sauce would work just fine for this recipe.
 
For the Cabbage Slaw:
1/4 of a head of Savoy or Napa cabbage
1/2 a small red onion
about 1 tsp of celery seed
Vegenaise or mayonnaise
1 tbsp. of Dijon mustard
a pinch of salt


Directions
Slice the red onion thinly for the cabbage slaw and set aside in a bowl of cold water. This takes some of the bite of the onion flavor which is essential since you will be eating these raw.
Foodie tip #9480: Putting onions in cold water also lowers the chance of crying while slicing into it. I always ice my onions first before getting into them because I'm such a baby.


Heat a pan and stir fry the chopped onions for the sauce until the onions just begin to caramelize. Add the rest of the ingredients and simmer on low for about 15 minutes or until the peaches are tender. Transfer the sauce into a blender and blend until smooth. Place BBQ sauce back in the pot and simmer on low for ten minutes.

While the sauce simmers, remove seitan from packaging and slice thinly. In a non-stick or cast iron skillet, brown the seitan. Once the sauce is finished, combine with the seitan and continue to cook on low for another 3-4 minutes (you may only want to use about half of the sauce since this recipe makes a sizable portion of BBQ sauce. But this sauce is so great, I'm sure you'll be able to use it in another dish). Set aside.

Thinly slice the cabbage and place in a bowl. Combine all of the other ingredients, including the red onion, in the bowl and mix together.

Toast your buns slightly and begin to make your sandwich. I suggest using more of the slaw than the seitan to have a balance of flavors on your sandwich.

Saturday, August 11, 2012

The Rosemary Post

The thing about fresh herbs sometimes is that yeah you may have great plans to cook something with them but if you don't use those herbs quickly you could end up throwing 90 percent of it away (because I mean really. A little goes a long way in this case).

Case in point: I bought a ton of rosemary for really cheap and was really excited to use it. But three days after I bought and it was still sitting in the fridge longing to be used. Even now I have four long stalks (sprigs? I'm bad on herb lingo) of the stuff in the freezer. But it will be used. This is my vow to you.

So, here are a couple of the things I made with rosemary. I hope you'll enjoy them both.

Sunday, July 29, 2012

Black Pepper Tofu


There are probably as many versions of black pepper tofu as there are people who cook it so my version is just one of many. Unlike many versions I've seen though, I've added green veggies in mine. Can never miss an opportunity to get your green vegetables in your meals. This version I made with green beans but I have made this with broccoli and it tasted just as great. I'm sure even a more Asian choice (like bok choy?) would be great as well. 

Black Pepper Tofu

Ingredients:
1/2 Block of frozen extra firm tofu, thawed
about 3 tbsp. crushed black peppercorns (or coarse-ground black pepper)
cornstarch or all purpose flour
about 1/2 cup of soy sauce
about 1/4 cup of sugar
about 2 teaspoons of ground ginger
1/2 small onion chopped fine
2 cloves of garlic, minced
a splash of balsamic vinegar*
a splash of chili oil (purely optional)
green beans, rinsed and chopped in thirds
oil for frying
Freezing tofu changes the texture making it more spongy.

Directions:
Cover the bottom of a shallow pan with oil and place over medium high heat.
Combine the cornstarch and black pepper.
Cut the tofu in 1/2" cubes. Dredge the tofu in the cornstarch mixture and fry in the heated oil.
Do not crowd the pan with the tofu (but even I don't follow this rule in a rush so don't take it as gospel).
Cook the tofu until golden brown. Drain and set aside.
Combine the soy sauce, sugar, ground ginger, and balsamic vinegar in a bowl and mix thoroughly.
Heat a small amount of oil over high heat in a non-stick or cast iron skillet.
Combine the garlic and onions and fry in the pan. Cook for 2 minutes or until the onions just begin to caramelize.
Add green beans and cook for about 5 minutes.
Add the chili oil and cook for 30 more seconds
Add the soy sauce mixture. When the soy sauce mixture reduces a little (shouldn't take more than 2 minutes), turn off the heat.
Combine the cooled tofu and serve with rice.

*Foodie Trick #2930: If ever you over-salt your food, adding a little vinegar will trick your taste buds and your food will taste less salty (though your sodium content will still be high. Too much salt is still a bad thing). Because the sauce for this recipe is made majorly of soy sauce, I thought adding a splash of balsamic would add depth of flavor and take some of the saltiness of the soy sauce away as well. If you'd like, you could use less soy sauce and add water but then your sauce might be a little runny and thin. And runny sauce is just tragic.


Thursday, July 19, 2012

How I Cook Okra [for Cajun Rice]

I tend to get a little overzealous when I go to the store sometimes.

I saw prepackaged fresh okra for $2.12 at this great international market and I couldn't not buy it.

But it sat in my fridge for about a week before I put it to good use.

Now okra isn't for everyone. And cooking it isn't necessarily hard particularly if you're using it in a stew (a la gumbo). However, if you're particular about the amount of slime that may secrete from your okra in your dish then I say follow my simple method of cooking it.

Now I'm sure someone with a more sciencey background will refute my method but this has worked for me for years so I'll just stick to my method if you don't mind.

The key to reducing okra to minimal slimeyness is to keep it as dry as possible the whole time you handle it.

After washing okra, allow it to dry on a paper towel before cutting into it.

When you are cutting it, make sure your knife and your cutting board is as dry as you can get it. When cutting your okra, slice the tops off and discard them. That's the slime source. You don't want that.

Even with all the precautions there's still a little slime on the knife.
Finally, cook all of your other vegetables before you are ready to cook your okra. This is important because the vegetables you cook will release their moisture and if the okra's in there those veggies will trigger its need to secrete. Trust me on this one.

If you follow all of this you should have relatively slime-free okra for dishes such as the one I will talk about now!


Cajun Rice

Ingredients
Rice, cooked and allowed to cool
Okra, sliced (follow directions above on how to prepare the okra)
1/2 Red bell pepper, diced
Frozen corn kernels
1/2 onion, finely chopped
2 cloves of garlic, finely chopped
Cajun seasoning and/or Old Bay (I used a little bit of both)
Oil


Directions
Cook the rice (How to cook rice tutorial will come soon. I have gotten lazy at the ripe old age of 26 so I just use a rice cooker) and set aside to cool.

Heat a non-stick or cast-iron skillet to medium high heat and add a little oil in the pan. Once heated, add onion, pepper, and garlic to the pan.

Once the  vegetables caramelize,  add the frozen corn kernels and cook for 3 minutes or until the corn is thawed.

Add the okra and cook for 7-10 minutes stirring frequently to prevent burning. Add the cajun seasoning and Old Bay.

Turn off the heat and fold the rice gently into the vegetable mix.


Saturday, July 14, 2012

Broccoli Fritters


It was a blah Saturday morning.

I didn't want to get out of bed. So for the past few hours I've been lying in bed watching Wild China on Netflix (add it to your queue if you like NatGeo anything).

Then the inevitable happened.

Grumbles from my stomach would not allow me to stay in bed for the next 6 hours learning about rubber plantations and pandas. Had to get up and forage for food.

I haven't gone shopping yet so my protein stash is depleted but I remembered looking at a Smitten Kitchen entry on broccoli fritters and I knew I had some broccoli left so I decided to give it a shot (Smitten Kitchen is a pretty amazing blog definitely worth checking out).

Of course the recipe is adjusted to fit my insane flavor requirements ("Just one clove of garlic?? No I need at least three to make this work!!") so I would suggest tweaking certain things to make it fit your flavor buds as always.
I would've added the whole thing, but at some point I have to interact with people and not smell like I just came back from a vampire hunt.


Broccoli Fritters

Ingredients:
-1 head of broccoli
-3 cloves of garlic finely minced
-1/4 cup of sharp cheddar cheese
-about 1/4 cup of flour
-egg (optional for those into that sort of thing)
-salt
-a pinch of cayenne pepper
-oil (I used vegetable but olive oil would work well too)


Directions

Cut the broccoli in small pieces and boil in a very small amount of water for about 5 minutes. Set aside to cool slightly. Broccoli, like many other vegetables makes its own water when it's cooking. It just needs a boost at the beginning.

While the broccoli cooks combine all of the other ingredients in a bowl. If you're using the egg, put this i the bowl first and whisk it. Then combine the other ingredients.


Mash the broccoli lightly with a fork (or a potato masher if you have one) and fold the broccoli in with the other ingredients.

Heat the oil in a non-stick or cast iron skillet over medium heat. There should be just enough oil to cover the bottom of the pan.

Test the oil by putting a pea-sized amount of the batter in the pan. If it begins to bubble the oil is ready.

Scoop a spoon of the mixture and drop it in the pan. You may need to flatten it slightly with the back of the spoon for an even cooking. Also, try to cook only 2-3 at a time in the skillet to not crowd the pan. 

Brown the fritters on both sides and drain on a few paper towels.

Serve by themselves or with a yogurt sauce or sour cream.


Saturday, July 7, 2012

Beans, Beans, Good For Your Heart

Break out the Bean-O ladies and gents because boy, do I have a great bean dish for you!


I have been making some severe budget cuts recently and I had to cut down a little bit on my food budget. So to get me started I thought "Hm. What can I make for less than 7 bucks that would feed me for a few days?" And I thought of this.

Behold, the most budget-friendly, healthy yet satisfying meal that won't put a hurting on your pocket.


White Beans with Spinach and Tomatoes

Ingredients:
1 can of cannelini beans, drained and rinsed
1 can of crushed tomatoes (I used the Italian-seasoned variety)
about 2 spoons of tomato paste
1 pack of frozen chopped spinach, slightly thawed
2 Tofurky Italian Sausages, chopped

1/2 a small onion, finely chopped
about a cup of Water or vegetable stock (Let's keep it with water. Water's free and this recipe will be plentiful flavorful believe me)
Garlic powder
a pinch of cayenne pepper
Salt and pepper to taste


Directions:
Saute the onion until caramelized and add the chopped sausages and cook until brown. Then add all the other ingredients (no real order to this).

Simmer for 25 minutes. Serve with either crusty bread or rice. Or eat it as it is.


Friday, June 22, 2012

Garlicky Green Beans and Potatoes


 I love green beans.


I also love potatoes.


Put them both together and you have a love fest on a plate.

So I stir-fried some green beans with these small potatoes for lunch and it really made my day.

I present garlicky green beans and potatoes:

Ingredients:

Green beans snapped and washed
Fingerling potatoes or any small white potato
5 cloves of garlic minced
Olive oil
salt and pepper to taste
Green beans and potatoes after their shock treatment.

Boil the potatoes for 15 minutes or until they are soft.  Set aside.

Steam the green beans for 5 minutes.

Shock the green beans in ice cold water. Drain and set aside


Heat a skillet with olive oil on medium high. Saute your minced garlic.

After garlic is browned, throw in your potatoes and green beans and heat through. Add salt and pepper and turn off the heat and serve.

Monday, June 18, 2012

Beet and Carrot "Latkes"

 I like rich foods. There's rarely a meal I eat that I don't have tofu or seitan in it. But sometimes it's good to indulge in the lighter vegetarian fare. Tonight was one of those sometimes.

I paired the cakes with a salad and crumbled some queso fresco on top (On one of my grocery whims I bought this cheese with big plans of cooking some deluxe Mexican fare. Now I'm just trying to use it before it goes bad).


Here is the recipe for beet and carrot latkes:

a piece of a beet (the piece goes a long way believe me)
2 small carrots
one half a small onion
one small clove of garlic
a small amount of flour
paprika
nutritional yeast
salt and pepper to taste

Grate the veggies and mix all the ingredients together. Make small patties with your hand and place on a well-oiled sheet pan.

Bake at 350° until slightly blackened** on each side. That should be about 15 minutes tops but check frequently. 


**NOTE: It doesn't take long for this to happen because of the high sugar content in both the beets and the carrots. You know how after sugar turns to caramel it then turns into black crunchy crap? Same principles.

Monday, June 11, 2012

Taco Time


After work, I had a hankering for some tacos and for the life of me I didn't know why. Maybe one too many listens to the merengue mixes on YouTube? Or was it the Latin food trucks within a block from my job sending me subliminal messages? I don't know what it was but whatever it was worked. So I decided to go to the store and pick up some ingredients.


Then I got to the store and realized I never made soft tacos in my life. At least I don't remember. Go figure.

So I went searching for some taco recipes and found a few that got my juices flowing (this is one of the many I looked at. Really it's one of two I looked at before my attention went elsewhere) and decided to try a fish taco recipe.

Naturally I don't eat fish so I substituted the fish for some tofu and baked it instead of fried it (look at me being healthy). Tofu, like fish, is one of those ingredients that soaks up whatever flavor you want it to have so it's very versatile.

Then I threw a lot of veggies that seemed to go together in a slaw, added some chili sauce and voila. My rendition of a veg-friendly "fish" taco.

"Fish" Tacos


For the Tofu:
Tofu
Soy Sauce
Equal parts flour and white cornmeal
Chili powder
salt and pepper
Oil for baking


For Slaw:
Cabbage
Onions
1 clove of Garlic
Radishes
Corn
Cilantro (I used dried because that's all I had but I' sure fresh would've been so much better)
salt and pepper
The juice of 1/2 lime

For Sauce
Mayo (or Vegenaise)
Chili powder
A small amount of red pepper flakes
Juice of 1/2 lime
salt and pepper

Slice the tofu in strips (about 1/4" thick) and soak it in equal parts soy sauce and water while you make the slaw.

Grate all vegetables (including the onion and garlic) with the small grate size. Mix the other ingredients and set aside

Preheat the oven to 400°.

Drain the tofu and dredge each slice in the cornmeal/flour batter. In a shallow baking dish add a shallow layer of oil and place the tofu in the pan. The strips should not touch each other.

After about ten minutes, flip the tofu strips and allow to cook on the other side. Allow to cook another 5 minutes and remove and drain the excess oil.

Combine all the ingredients for the sauce. Taste it. I felt like I should say that.


Warm your tortillas and get to building your tacos. I warm my tortillas like so:


It gives it that nice charred look on the edges. I'll probably have hell to pay when I'm cleaning the eyes of my stove but whatever.


Steam!

I really didn't like any of the pictures I took this morning but looking back I saw that I caught some steam and I got excited. I don't know why.

If you squint in just the right light, hold your head slightly to the left and get real close you'll see it.

Can you see it?

Saturday, June 9, 2012

Pasta with Brussel Sprouts and Feta

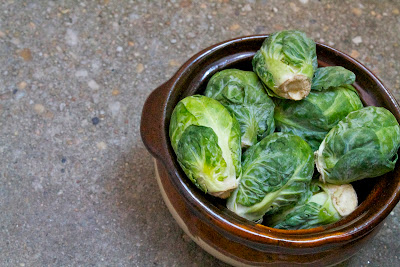
Brussel Sprouts: The Jolly Green Giant's blessing on humanity
So not until my adult life did I experience the pleasure of eating my first brussel sprout. I know some people have these awful flashbacks of crying at the dinner table in front of a heaping pile of boiled, mushy, stinky brussel sprouts as your mom stared sternly at you over her glasses across the table as she repeated just one command every 15 minutes: "Eat." (Resurfacing of suppressed childhood experiences in 3, 2...)

But I did not have the privilege of eating them in childhood because they were just not in mother dearest's price range.


Once I discovered just how good these crisp green globes of bittery deliciousness could be I began cooking them every way possible. Eventually I made my to adding them to pasta which was such a success I wanted to share the recipe.

DISCLAIMER: I am not the measuring type unless I'm baking so I'm going to just list my ingredients. Really I think you should be the one to determine what your taste buds would like and how much you would like of it. I tend to use a lot of onion and garlic in my dishes. Some people don't like that. Anyway here's what I put in the dish:

The ingredients

Brussel Sprouts, sliced
Olive Oil
Onion (red, yellow or white. I used yellow onions in this recipe)
Garlic, coarsely chopped
Lemon zest
Any short pasta--I've used both fusilli and farfalle and they stood up perfectly with the veggies.
Field Roast Smoked Tomato deli slices finely chopped--not shown above (see NOTE below)
Feta cheese--not shown above
Salt and pepper to taste


Boil your pasta according to the package directions and set aside. Save a little of the pasta water too if you can.

In a frying pan, add olive oil and stir fry the onion and garlic until they are just about to caramelize. Then add the Field Roast deli slices and cook until brown (about 2 minutes).

Add the brussel sprouts and stir fry on medium for about 3 minutes. Your sprouts should be a really bright green. Because they're sliced they don't take to long to cook so resist the urge to cook them for a long time.

If you kept some pasta water, add a ladle full in the pan and let the veggies steam for a couple of minutes. If you didn't keep any it's cool. Use regular water or, if you want to get fancy use some vegetable stock or even dry white wine if you have some available.

Once some of the water evaporates turn off the fire and pour your pasta in with the veggies. Add salt, pepper, lemon zest and feta cheese.

NOTE: If you've never heard of the Field Roast products yous should look them up. I will not go into detail about how fantastic (and time-saving) these products are right now so I encourage some googling. You should be able to find the products at Whole Foods. They're good about stuff like that.
The recipe with fusilli instead of farfalle

If you don't like this dish something is seriously wrong. I think I'm going to say that about everything I post though.


Newbie Alert!


 I've always been in the kitchen cooking. I was raised in a communal living setting (meaning multiple families living under one roof) and my mother worked late nights so making food for myself and the others in my house became a natural duty. I've always loved to create new dishes and in recent times I've realized that I actually like to photograph my creations too. So I hope you enjoy some of the stuff you'll see around here just as much as I've enjoyed creating it.

  Oh did I mention I was vegetarian? That seems like some pertinent information right about now. Hence the title of my blog. Oh, and the "Snaps" would be short for snapshots. Just so we're clear.

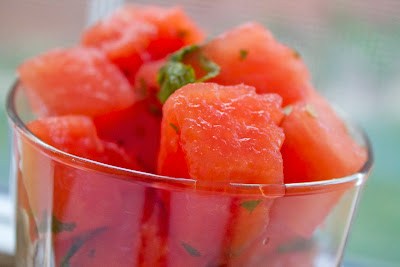
Watermelon with mint and peach schnapps. Just something I whipped up.

  And if you're wondering, no I am not one of those PETA card-carrying "all life is special life" type veggies. I was raised vegan and after awhile realized that I liked pizza too much to deprive myself of it for the rest of my life so I became and lacto vegetarian (my mother hates that I eat dairy by the way. She says it's the gateway drug to meat. Bless her heart).  So I've never really had this desire for meat and probably won't. That isn't to say I haven't tried it. But not eating it does not feel like a deprivation.


That's enough of that. I'll be posting pictures of the stuff I make in my little kitchen as regularly as I can. To my fellow veggies, I hope you'll like and maybe cook some of the things you see. To my omnivores out there: don't knock it until you've tried it. My roommate's a carnivore (like seriously, this chick loves her meat) and when I cook she eats my food and loves it. You might learn something.

Thanks for reading!